Wild Gourd Farm

Organic Gardening in St. Louis City

Monthly Archives: February 2011

Herb Spiral

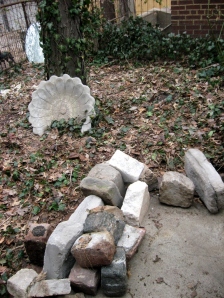
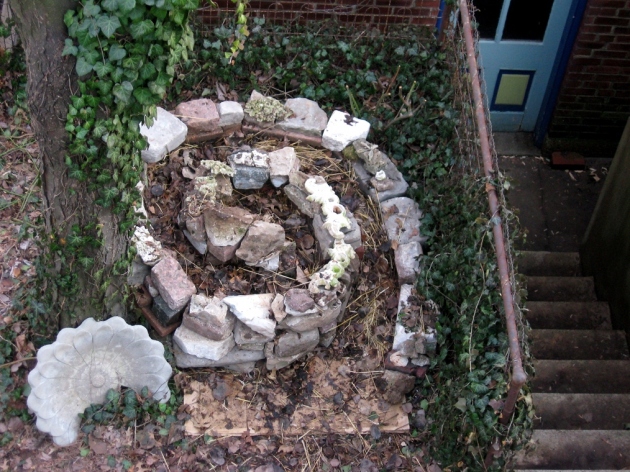
We took advantage of the beautiful weather today and built an herb spiral in Sallie’s courtyard, using free pavers, bricks, and stones we scavenged. The side yard would’ve provided more sun for the herbs, but we chose to build the spiral in the courtyard closer to our kitchen.

An herb spiral maximizes your planting space in a small area and provides varying levels of moisture and sunlight.  Rosemary and lavender, which thrive in sunny conditions and well draining soil, will be planted at the top; shade-tolerant plants like lemon balm, mint and parsley will be planted along the sides where there is more shade. We’ll also plant basil, chamomile,  lemongrass, echinacea, stevia, thyme, oregano, cilantro, and more.

Before:Before

During:Cardboard is placed underneath to prevent weeds. It will eventually decompose

Nearly finished:

Completed spiral:Herb spiral

Inside the spiral we packed leaves and straw to begin to build a healthy soil.

Frugal Friday: Laundry Soap

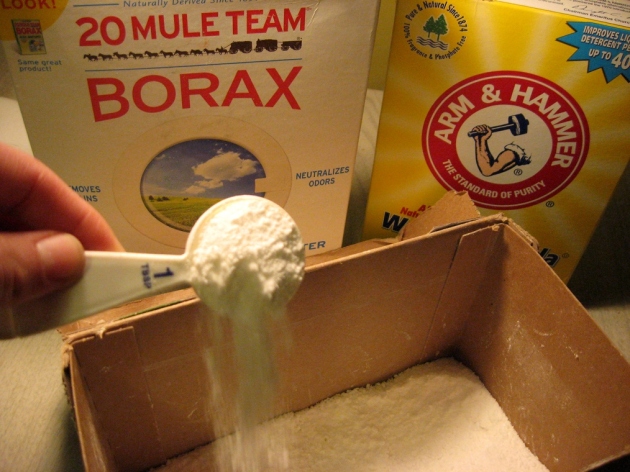
We try to make as many things as possible from scratch. All you need to make your own laundry soap is 1 cup of borax, 1 cup of washing soda (both naturally-occurring substances), and 2 bars of white soap. I shred the soap in a food processor, then add the borax and washing soda and process it to a fine powder.  It takes about 2 minutes, and you only need to use 1 tablespoon of your new laundry soap per load.

Frisbee dogs

Photos taken by Matt Rekart


Frugal Friday #2: Grow Light Fixture

Today we made another grow light for our seedlings. Store-bought grow lights are pretty expensive, so after doing some research and combining a few ideas, here’s what we came up with.

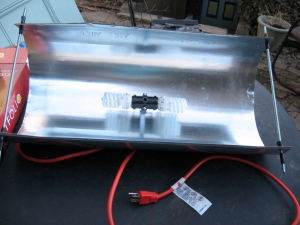
We started with the cheapest double-sided light fixture from the hardware store. The wires had to be routed up through the top of the fixture, with the threaded knob facing up.  We cut the female end off an extension cord so we could splice the wires together.

For the hood, we used 6″ diameter aluminum duct work/dryer vent, cut down to a 2 foot length. (We actually scored this for free; the hardware store was out of this particular size, and a customer nearby overheard and gave us a piece he happened to have in his truck.)  Threaded rods were drilled through each end for stability.

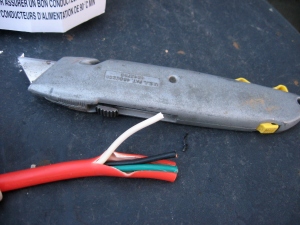
We exposed the wires of the extension cord and stripped the plastic off to expose the wire. Wire strippers are best for this job, but we used a box knife with great care.

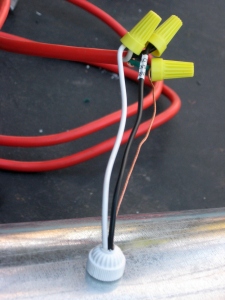
We drilled a hole in the center of the aluminum hood and the center of the white plastic cap that came with the fixture, which allowed us to use it as a nut. The wires were threaded up through the top of the hood and the fixture was secured by tightening the plastic nut.  We then connected all three wires from the extension cord to the corresponding wires of the light fixture. As you can see below, yellow wire  nuts were used to make a tight connection and for safety.We wrapped the wires with electrical tape from the white plastic nut all the way up past the yellow wire nuts.

We used the threaded rods to hold the aluminum hood in the right shape. We planned to use nuts to secure the rods in place, but cutting the rods to size with bolt cutters left the ends uneven so nuts couldn’t be used. Instead, we used electrical tape on either side to prevent the hood from sliding.

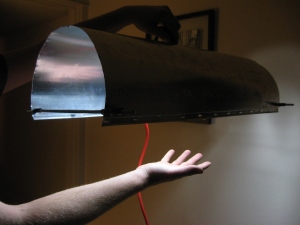
This is our finished product. We will hang the fixture by attaching chain to the threaded rods on all four corners. We use compact florescent bulbs for energy efficiency, with low heat and high light output.

We’ll use this fixture for  more seedlings to be started this weekend!

Dog house turned chicken coop

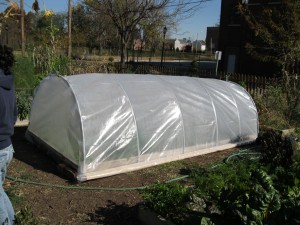
Here you can see the dog house in the background to the left of the hoop house.  We bought it for $30 intending to use it as a chicken coop.  It has a hinged roof, which will make collecting eggs easy.  This is the only picture I have of it before we started altering from a dog house into a chicken coop.

We raised the coop off of the ground by setting it on a coffee table we found in the trash. We bought the window and hinges from a local guy named Reegan, who has a warehouse full of amazing stuff on S. Broadway just south of the AB Brewery in the old Lemp Brewery area.  On Saturdays, he has a bicycle on the curb with a sign that says “Junque Sale.”  We highly recommend this place if you need any reused or antique building materials.

The sides of the dog house had siding on them but it was wearing out, so we ripped the siding off and pieced together T1-11 paneling scraps that we got from a friend. We also built three nesting boxes and a roosting pole on the interior of the coop. We will post pictures of the painted and completed coop and run in the near future.   It looks like we may be getting chickens a little sooner than we thought!

Edit: See more of our chicken coop in our post Our Chicken Set-Up.

Early seedlings

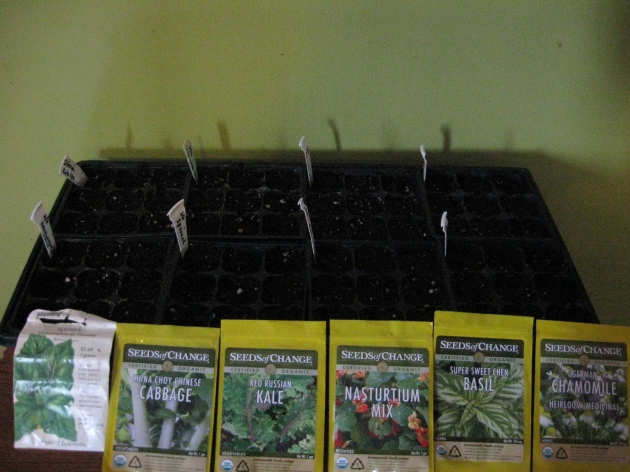
I started a full tray of seeds (72) yesterday. In my estimation, we are 8 weeks away from the last frost, which is usually around mid-April. This tray will sit in a south facing window once the seeds have germinated. We’ll transplant most of the seedlings into one of the hoop houses before the last frost to see if we can get a head start on the growing season.  Here’s what I started:

  • Nasturtium (Edible flower)
  • Bok Choi (Chinese Cabbage)
  • Kale
  • Chamomile
  • Basil
  • Spinach

Tomatoes, peppers and broccoli will be started in the basement under some lights later this weekend or next week.

Frugal Friday #1

I make the dog food for Maggie and Rosco (I will definitely discuss this further in a future post). Their meals typically consist of lentils, sweet potatoes, oats or rice, peanut butter, whatever vegetables I can get cheap at the market, and eggs and fish. Our freezer was stocked with trout from Eric’s fishing over New Year’s at the White River in Arkansas, so the dogs had been feasting on some good, fresh trout.

This week, Eric went out and bought the cheapest fish he could find at the supermarket. Usually this means catfish, which Rosco refuses to eat. This time it was whiting (AKA jack salmon). In nice weather, Eric spares me the smell and cooks the fish outside; unfortunately, this week the temperatures were in the teens or lower, so that wasn’t an option. The fish was boiled in water for only a few minutes, but the entire house smelled like a fish market (confirmed by a call from Sallie, who wondered if we were doing some sort of fish emulsion experiment in the basement). And, the funny part is the whiting is the only fish Rosco will actually eat.

Anyway, to combat the very offensive lingering odor, we lit all the candles we had and finished off a can of air freshener. Even today, when walking inside our noses were met with a confusing combination of vanilla, cinnamon, gardenia, and day-old horrible smelly fish.

It’s slowly getting better, but I ran into an issue this afternoon. Several of our candles had burned all the way down to the end of the wick, but there was still a bunch of wax left.

Which brings me to the introduction of our blog’s first Frugal Friday!

So I decided to make a new candle. Here’s how to make a candle out of leftover wax,  Read more of this post

Winter Update

Winter is a slow time of year for us. Our world is blanketed in snow, and though we have the hoop house and the semi-hoop house still standing, there is little to do garden-wise. We’re preparing for our new venture in chicken ownership, organizing our seed collection and garden plots for the spring, and assembling light fixtures for indoor seed starting.

Overall, we’re making sure we slow down and enjoy our time together before we immerse ourselves in our very busy spring season. We’ve spent our winter sledding with the dogs, hiking when the weather permits, spending time with family and friends, and trying new recipes and restaurants… check out the pictures below!

New Year, new fish

The year started off with fishing on the White River in Arkansas

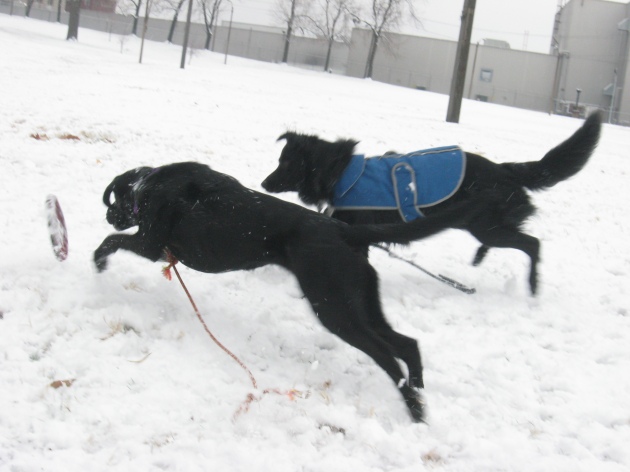
"Frisbee" is their favorite word

Maggie & Rosco loving their frisbee sessions in the snow!

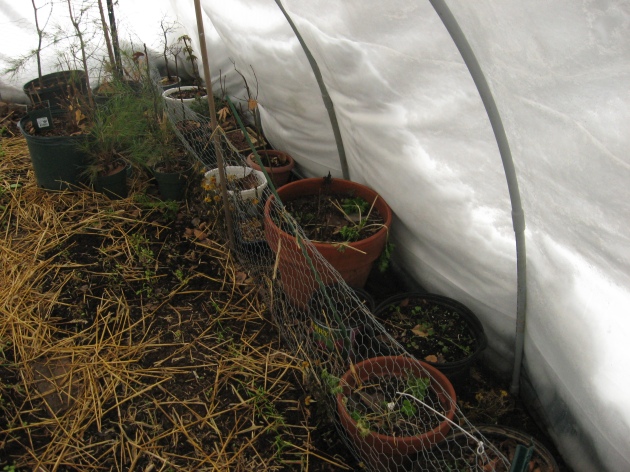
Inside the half-hoop house

Throughout the winter bonsai and herbs are stored in the side yard hoop house

Lettuce mix and spinach harvested from the community garden hoop house, January 30, 2011 (the carrots in our banner were harvested the same day)

A trip to the confluence of the Missouri and Mississippi Rivers (no, we're not the canoers)

We want help naming our chickens

There are 3 of us and there will  be 4 hens.  We are each naming one, but that leaves one for our friends and family to name.  Here are our ideas for names so far: Ida, Loraine, Jannica, Mrs. Butterworth, Poppy, Nora….If your name is chosen you get a dozen happy eggs (when they come) for free!  I do not know what breed of chickens we are going to get, but they will all be females.  We plan to get them early to mid March 2011.

An Introduction

We are a household made up of one industrious couple, one amazingly accommodating landlady, two dogs, and a future brood of chickens living in the urban oasis of the Soulard neighborhood in the city of St. Louis, Missouri.

Gardening is one of our passions and will very likely be our way of life in the future.  We are constantly looking for new methods of organic gardening and ways to implement the principles of permaculture. In our quest for a self sufficient lifestyle, we are also exploring methods of food preparation  and preservation, handcrafting household products, and re-using items discarded by others.

We have access to the side yard of our house where we have a 12′ by 7′ garden plot, which is enclosed in a semi-hoop house during the winter months.  This will also be the future location of our chicken coop and run.

In addition, we are fortunate enough to have two smaller garden plots at a local school, and a plot in a community garden that is also enclosed for the winter.

We intend to use this blog to document our work, share plans and recipes with friends and family, and network with other like-minded individuals. Welcome to our garden!