Wild Gourd Farm

Organic Gardening in St. Louis City

Category Archives: Projects

Outdoor Washing Station

2013_06_02_445We took some time off from the gardens on Sunday to work on a project we’d been planning for a long time- an outdoor washing station.

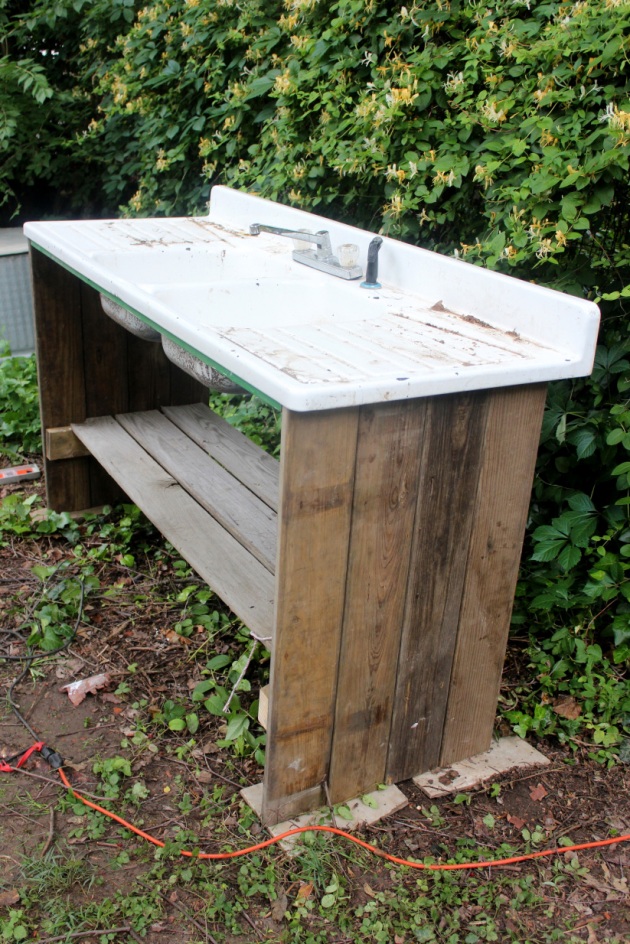
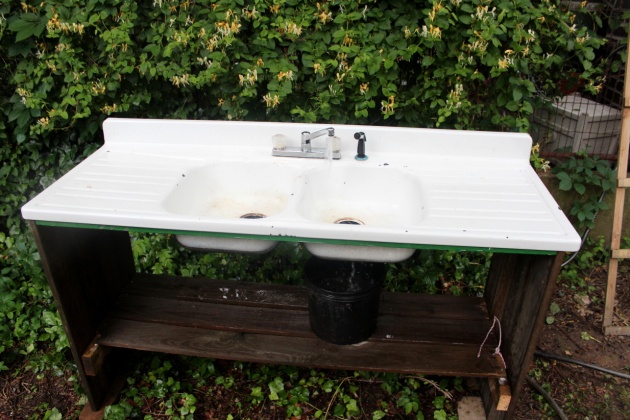
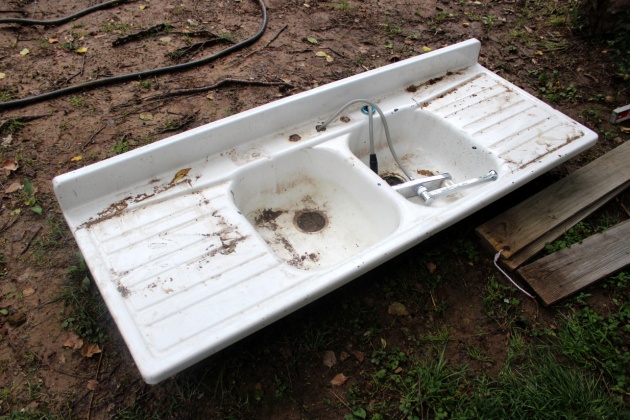
2013_06_02_436It all started falling into place a couple weeks ago when we found this cast iron double sink- complete with faucet and sprayer- in the alley while walking the dogs.  Around the same time, a neighbor of ours started leaving lumber from his home remodel in our side yard for us to use (he somehow got the crazy idea that we collect and re-use materials like that). All we’d need to buy were fittings to secure the sink faucet and adapters to hook the sink up to our hose.

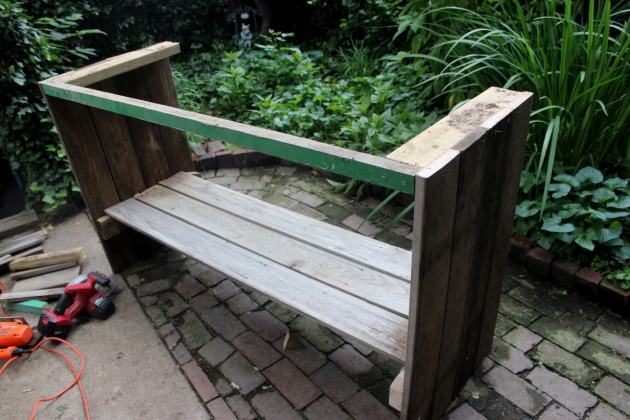
2013_06_02_432 So Eric drew up a plan to build a frame to fit the sink. We had it measured, cut, glued and screwed in under two hours. The sink rests on top of the frame securely.

2013_06_02_438We set the new washing station in the side yard, elevating it off the ground on some flat stones to keep the wood from rotting (we’ll probably paint/finish it some day). Next we added the fittings and adapters to secure the sink faucet and connect our garden hose.

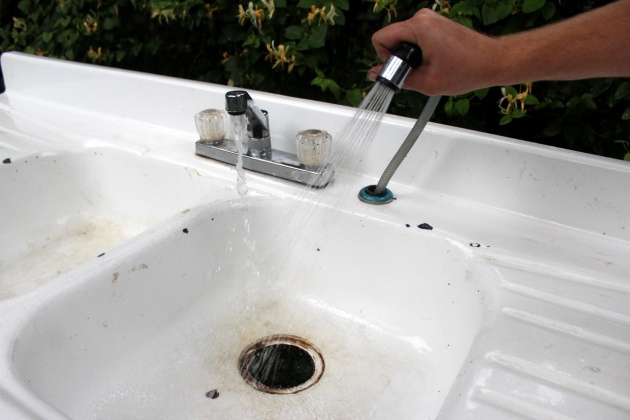
2013_06_02_442It works! We’ll still need the hose for watering in the side yard, so we won’t keep the sink hooked up all the time. It’s easy enough to connect and disconnect the hose from the back, though.

2013_06_02_445The bottom shelf will be used for storage and to hold a couple of buckets to catch the water from the drains.  I’m excited to use our new washing station, with its double sink and ample draining space, to rinse off greens and scrub root crops without having to get our nice, white porcelain kitchen sink all dirty. All in all, I’d say it was a pretty good use of our free materials and a Sunday afternoon!

Bloggin’ bout Mushroom Loggin’

It might be an understatement to say that we were inspired by the mushroom log workshop at Maya Creek. Since then, we’ve inoculated logs with over 2,500 mushroom spore plugs (from Fungi Perfecti)!

At the workshop we learned that white oak is the best wood for shiitake mushrooms. We weren’t necessarily planning on growing so many mushrooms,  but after Eric’s grandfather passed, we were told that a white oak tree in his yard needed to come down before they could sell the house. We think Eric’s grandfather- a very resourceful craftsman- would be happy to know that the tree is being used in his honor even after it was cut down.

Eric worked with the tree company that removed the white oak, and picked out the best wood for us to work with. Tree limbs have a greater ratio of sapwood to heartwood than the trunk, and mushrooms feed on sapwood, so we used mostly limbs with a diameter of 6 to 10 inches.

These are about half of the logs we inoculated last week, with shiitake plugs. They’ve since been leaned vertically around the side yard in areas with 90% shade.

The other half we inoculated with oyster mushroom spores, and stacked log-cabin-style in the shade.

Here are the logs we already had inoculated, including two logs we took home from Maya Creek and a dozen logs we helped inoculate with Backdoor Harvest about a month ago. Eric got the white oak limbs for free from a local tree trimmer.

If we’re lucky we’ll see some mushrooms before winter, or at least signs of mycellium, the vegetative part of the fungus, colonizing the logs. Once colonized, the logs should regularly “fruit” every 8 weeks for 5 + years!

Mothers’ Day Herb Spiral

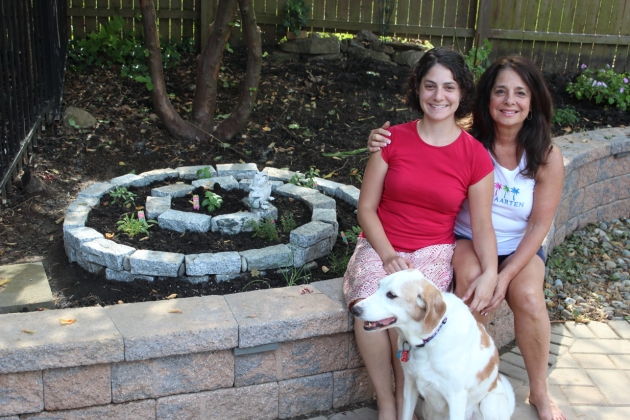
We celebrated Mothers’ Day with my mom in Philly by building and planting an herb spiral for her. Now she’ll have easy access to fresh sweet basil, Thai basil, thyme, sage, onion chives, and rosemary!

My mom selected the area, which gets full morning sun and is close to her kitchen. To get the spot ready we had to transplant some daylilies and trim the tree in the back to allow for more sunlight. We then leveled the area and built the first course. The second level of blocks were placed between the joints of the first level for stability, and we built up another level of blocks in the center to give the spiral some height. We used landscape block adhesive to secure the topmost level of blocks before adding our topsoil, humus and manure.

You can click the images below to see the whole process.

Happy belated Mothers’ Day to all you moms out there!

Keyhole Gardens

In our research on gardening methods we’ve come across keyhole gardens, which are extremely functional because they allow easy access to the interior of the garden. We particularly like the style of keyhole garden that is used in Africa, which includes a compost basket in the center.

We built a compost basket out of sticks and stakes we had lying around the yard. We wove the basket with pliable pine branches, keeping it loose enough to allow the compost to work its way out over time. We dug a drainage pit in the keyhole area that will hopefully collect water to build up a small aquifer beneath it,  ideally reducing the amount of watering we’ll need to do this summer.

We like the keyhole concept so much that we wanted to build another one at our Iowa Street garden (formerly Dave’s Place)!

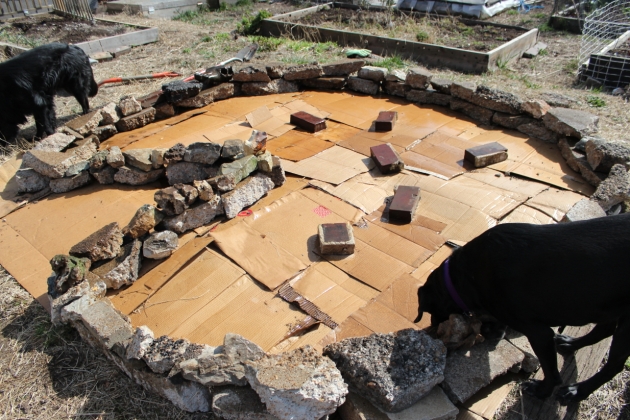
We had a lot of open space to work with, which unfortunately included a very intrusive grass. We laid down cardboard to smother and hopefully kill it. We then outlined the shape of the keyhole garden with “urbanite,” which we got for free from someone tearing up their sidewalk.

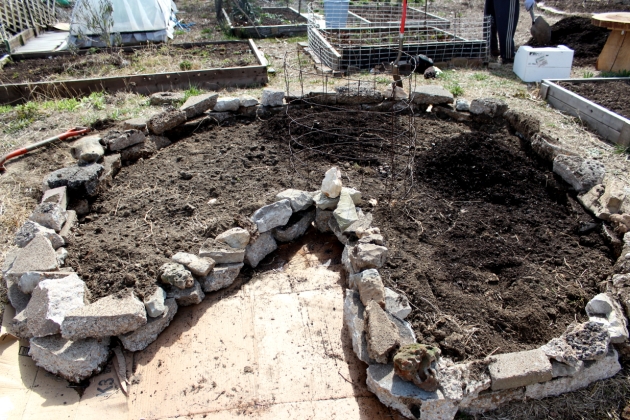
Next we added some of the soil that had been in that area, as well as some leaf compost, straw, and our own finished compost (thanks to the hens). We’ll continue to build up the soil before we plant– we just got some granite dust and sand to add.


Instead of weaving a basket, we used a roll of wire, similar to chicken wire. As you can see, the wall is 2 rows high. We’ll probably continue to build it, as the taller the retaining wall and the higher the mound of soil, the less bending we’ll need to do.

Between our two new keyhole gardens, we’ll have lots of new space to plant this year. We’ll be trying new plants, like ginger, jerusalem artichokes, and some new flowers and herbs.

Our Half Hoop House, An Overview

Our garden in the side yard is too big to enclose with a hinged cold frame hoop house, like the one we showed in our last post. Last year we came up with the idea of building a half hoop house when we realized that we couldn’t construct a full one due to a large bird house on a pole concreted into the ground right next to the garden plot. Since we’re renting, we decided to build around it.

Just a note, if you’re looking to cover your garden for the winter, it’s much easier to enclose a raised bed garden that has a wooden frame. That way you can attach the PVC conduit pipes to the frame using the PVC U-brackets (like this one) we showed in our cold frame post.

As you can see on the left side of the picture, only one long side of our garden has a wood frame to attach the PVC and U-brackets to. We attached five  7 1/2 ‘ PVC pipes vertically, evenly spaced to form the straight side of the half hoop house.   On the other long side (right) we measured out the spacing and fit the ends of our PVC pipes over rebar we hammered into the ground. These were then bent and inserted into L brackets at the top of the straight side, connecting the two together.

We then added extra support to the structure by attaching PVC pipes horizontally across the frame, using electrical tape. You can see the reinforcement in this picture, taken after we had attached the plastic sheeting. This extra support  strengthens the hoop house so it can stand up to the snow and wind over the winter.

As for the door, we kept it in place during the summer. Last year, we built it by constructing a frame out of 2x4s. Both sides of the door frame were cemented into the ground, and reinforced with horizontal 2x4s. At both points where the door frame meets the PVC pipe at the top, we drilled holes straight through the face of the wooden frame and used zip ties to attach it to the PVC pipe. We made the door out of scrap lumber and slapped on some hinges, then added a handle and lock to secure it when closed. We also added weather stripping to keep the doorway more insulated.

Next we draped a large piece of polyethylene plastic sheeting over the PVC frame.  The plastic was attached to the wooden frame at the bottom (to the left of the picture) using duct tape furring strips and staples, as shown in our cold frame post. On the right side where there was no wooden frame, we buried the plastic and weighed it down using landscaping blocks we scored for free off Craigslist.

The two short ends (front and back) of the structure were then sealed with plastic sheeting, which was stapled to the wooden frame at the bottom and attached to the top with PVC snap clamps (mentioned in the cold frame post).

Note: It’s best to attach the plastic to the front and back first, so the top sheet  overlaps and prevents any rain or snow from getting in.
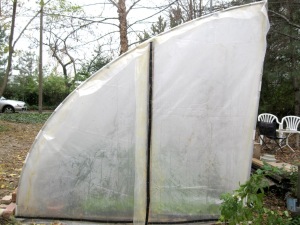
On the back side we stapled the plastic along the bottom and also to a wooden post in the middle, which was cemented into the ground and attached to the PVC pipe with a zip tie. Snap clamps were used at the top and along the  side.

The end result:

We re-used all of our materials from last year, including the PVC pipe and polyethylene plastic sheeting. While these are not environmentally friendly materials, we’re determined to get the most use out of them as possible. Using the duct tape furring strips and snap clamps allows us to easily disassemble the hoop house and store it for the next year.
Herb Spiral

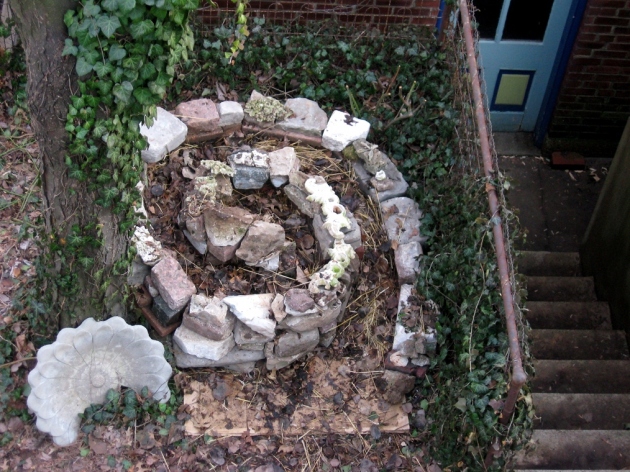
We took advantage of the beautiful weather today and built an herb spiral in Sallie’s courtyard, using free pavers, bricks, and stones we scavenged. The side yard would’ve provided more sun for the herbs, but we chose to build the spiral in the courtyard closer to our kitchen.

An herb spiral maximizes your planting space in a small area and provides varying levels of moisture and sunlight.  Rosemary and lavender, which thrive in sunny conditions and well draining soil, will be planted at the top; shade-tolerant plants like lemon balm, mint and parsley will be planted along the sides where there is more shade. We’ll also plant basil, chamomile,  lemongrass, echinacea, stevia, thyme, oregano, cilantro, and more.

Before:Before

During:Cardboard is placed underneath to prevent weeds. It will eventually decompose

Nearly finished:

Completed spiral:Herb spiral

Inside the spiral we packed leaves and straw to begin to build a healthy soil.