Sorry, dear readers, for the lack of posts lately. Have no fear, we’re still working tirelessly in the gardens, it’s just my blogging time has been constrained since I’ve started working (outside the home) again, at a small, family-owned grocery store. I have a huge amount of respect for the owners and all of the employees there; the store’s slogan is “Know Your Food” and everyone is committed to the mission of supporting local farmers and providing organically grown, sustainably-raised products.
You probably know that I identify as a vegan, though I do sometimes use the eggs from our own chickens in cooking or baking- I know they have a happy life. My ethics haven’t changed, and I will always vehemently oppose factory farms and CAFOs, but I have started consuming dairy products, in very limited quantities. I’m not talking about straight-up buying Velveeta or Cheez-Whiz or anything- at the very least the dairy at the store is nearly all produced humanely and sustainably, though I’m still hesitant.
The thing is, given the time and energy that goes into producing the product and its packaging (plastic is made from petroleum after all, and petroleum is inevitably used in the production of glass and cardboard as well), it hurts my soul way more to see that product go to waste. In most cases, expired dairy products from the store aren’t just discarded like at most grocery chains- they’re up for grabs by employees before being donated to a local food pantry. However, this week there was a whole case of organic goat milk that expired, which the food pantry didn’t want. So what’s an ethical vegan to do?

Make goat cheese, that’s what!
It’s really pretty simple to make your own goat cheese. Besides time, here’s what you need:
- 1 quart goat milk
- up to 1/4 cup of lemon juice or vinegar (I used white vinegar)
- salt and other herbs as desired
Also, along with everyday kitchen supplies, you’ll need a candy thermometer and cheese cloth or a similar cloth straining bag.
Here’s what you do (click on photos to enlarge):
 1. Heat goat milk in a large pot on low-medium heat to slowly reach 180ºF.You don’t want to just bring it to a boil at high heat because you’ll scald the milk at the bottom of the pot, and that’s less milk to be turned into cheese.
 2. Once the milk has reached 180ºF, turn off the heat and slowly add the lemon juice or vinegar while stirring. The acidity will cause the milk to curdle. I used white vinegar and poured it in a little at a time until the curds were visible. Let sit for 10-15 minutes and you’ll see the curds separate from the watery whey more visibly. (I actually had to do this step twice, as the first time I used too little vinegar and the curds were minimal. I thought they’d develop once I let it sit, but no such luck. So I re-heated and added more vinegar until the curds that developed were bigger.)
 3. Pour the curds and whey into your mesh straining bag, then hang over a bowl to catch the whey. I used a nut milk bag I had made from organic hemp and cotton muslin, which I use to make almond milk. Other recipes say to use 4 layers of cheesecloth, then tie the corners together to form a bag. Conveniently, I could hang my bag from my kitchen faucet. You could also tie the bag to a large spoon, and balance the spoon over the bowl with the bag hanging down in it.

My bag turned out to be a little too thick to get all the liquid out just by hanging it, so I used gravity to my advantage by putting the mesh bag in a strainer over a bowl, then weighing it down with a small white crock and a cantaloupe. Obviously you could use other things to weigh it down, I just happened to have an over-ripe, starting-to-go-bad cantaloupe I rescued from work 🙂
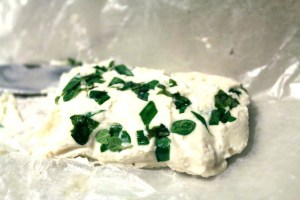
 4. Say cheese! After a few hours, all that’s left should be creamy goat cheese. By weight, the quart of goat milk produced about 1/4 pound of cheese. I scraped the cheese out of my bag and into a bowl, then mixed in some salt. I kept some plain, and to the rest I added fresh oregano, basil, and nasturtium. Then to be fancy I sprinkled more herbs in a line on wax paper, gently transferred the creamy cheese over them, and wrapped it up into a log to be refrigerated.
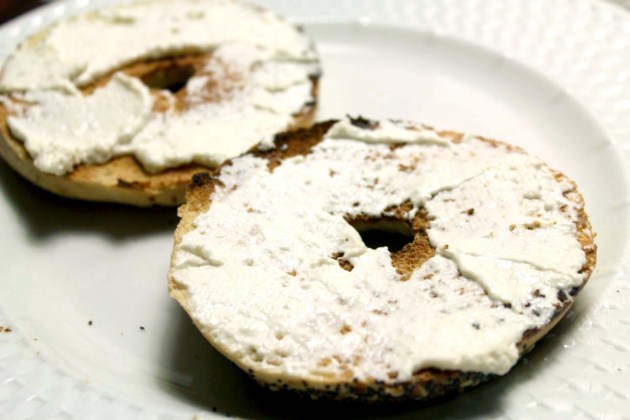
The cheese firmed up a little more in the fridge, but it’s still a little softer and creamier than traditional goat cheese. I used it on pizza last night and it was seriously the best ever. This morning, this vegan had a rare treat for breakfast:

The closest to a bagel with cream cheese I’ve had in 5 years, and I didn’t even have to betray my ethics. Also way better than the soy-based vegan “cream cheese” you get at the store.
One thing is for sure, when we do finally have our own farm, we absolutely must have milk goats!
Super-duper Frugal Saturday Bonus: turns out there are lots of uses for the whey produced in cheese making! The Prairie Homestead has some great ideas here. I haven’t decided what to do with our whey yet, I’ll let you know!


OK – I really want to do this… but where do I get goats milk?
Thanks for checking out our blog! We really enjoyed our visit to your place, and the banana bread (oh, and the jars/bottles too)!
Someday we’ll have our own goats for milk! For now, I got mine from Local Harvest Grocery in Tower Grove, though there isn’t any in stock right now. Their new store in Kirkwood is bigger and might have it, or Whole Foods. Or you can get it directly from the farmer… here’s a link to a directory of farms in Missouri offering raw cows’ milk, and a bunch of them have goat milk, too: http://www.realmilk.com/where05.html#mo.
Would love to know how it goes! Thanks again!